

Hey, I thought you may be interested to know a little about the basics of what goes into creating an image like "Beam Me Up"
So, first off, there is like, a bunch of stuff I'm not going to talk about in this post, but let me know if you'd be interested! The stuff I won't really cover in this in the hopes of keeping this pretty clear and simple and short-ish. That stuff is mainly research, camera settings, camera details, composing the shots, apps to figure out where the Milky Way will be, etc. This post is about putting the image together:
Step 1: Get all the photos and stitch em together. For the complete image I stitched together two different panoramic images created from 6 vertical exposures. One panorama is for the milky way, exposure and settings in the camera are set to get the best image of the milky way/stars. The other panorama is a set of vertical exposures with camera settings that are meant to cut down on noise in the foreground of the image/rocks. (see below for all exposures used)

The above image is just to illustrate three vertical photos being brought together. The stitching process can be done in Adobe Lightroom and/or Adobe Photoshop. For this image I used Photoshop. I used the camera raw filter to create the .dng raw of the stitched image.
Step 2: Bring all the images together...
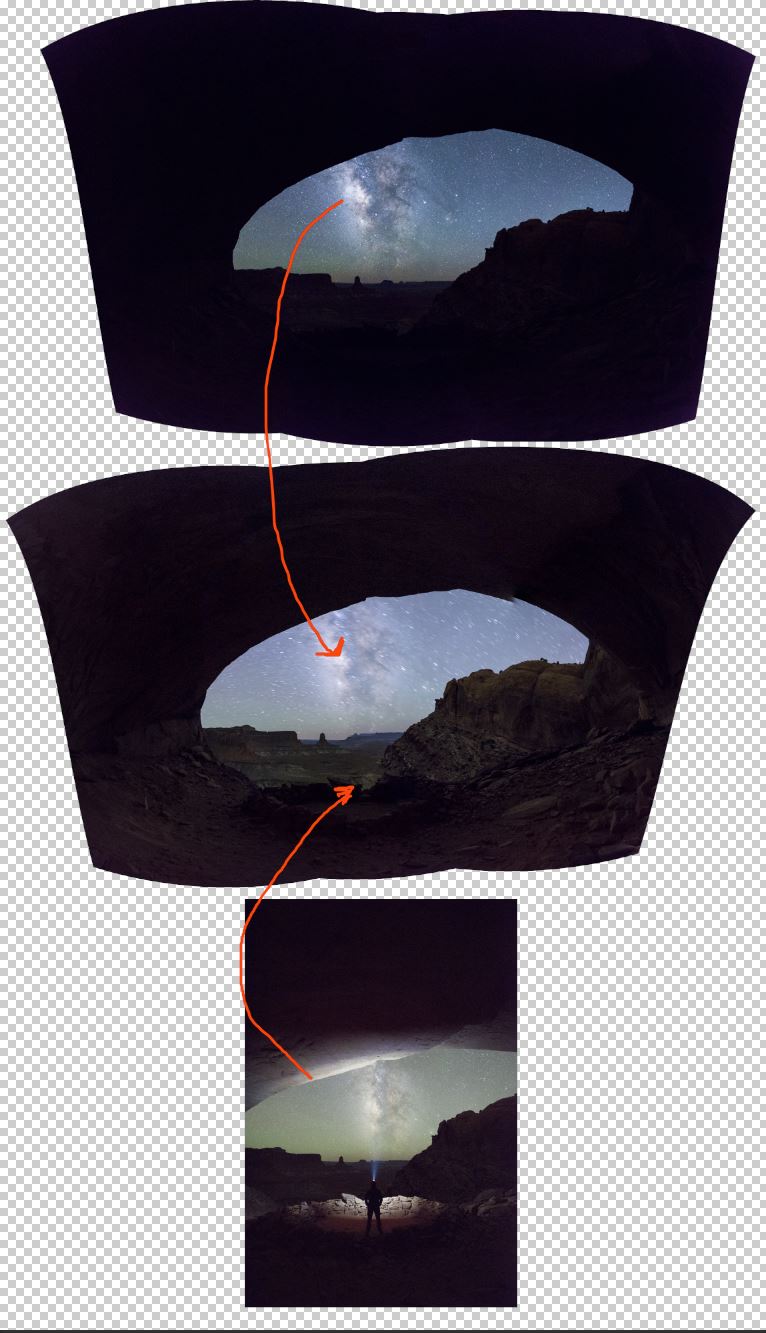
There is a lot to do this well and that process on its own is worth a dedicated post, but these are the basic three images brought together to create the image. Take note that one panorama has a sharp milkyway and stars, but the foreground is too dark and the second panorama, the stars are blurry because of how long the photos were exposed for but have some light inside the rocks of the foreground and midground.
Step 3: Color temperature, dodging (brightening) and burning (darkening) color adjustments and sharpening

Consider supporting the production of this art and these behind-the-image write-ups for 1/5 the cost ($2/mo) of a monthly Hulu subscription!! 1/3 of the money is donated to the Nature Conservancy.